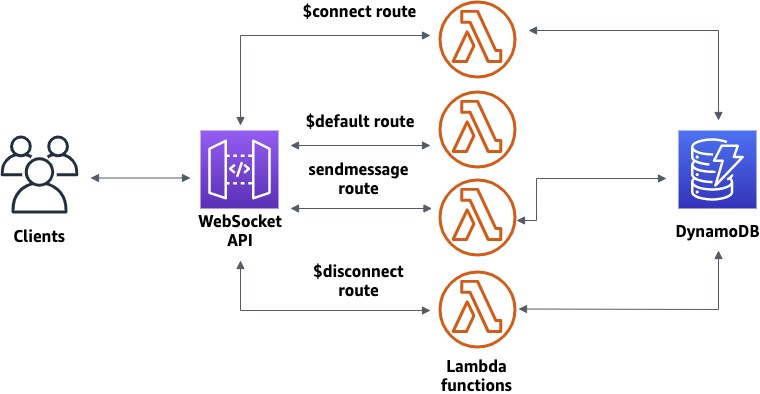
To create WebSocket APIs in ASP.NET Core, you can follow these steps:
Set up a New ASP.NET Core Project
- Open Visual Studio or your preferred IDE.
- Create a new ASP.NET Core Web Application project.
- Choose the API template, as this will be the base for your WebSocket API.
Add WebSocket Support in Startup
- Open
Startup.cs(orProgram.csin .NET 6 or later). - In the
Configuremethod, add WebSocket support by callingUseWebSockets().
public void Configure(IApplicationBuilder app, IWebHostEnvironment env)
{
    if (env.IsDevelopment())
    {
        app.UseDeveloperExceptionPage();
    }
    else
    {
        app.UseExceptionHandler("/Home/Error");
        app.UseHsts();
    }

    // Enable WebSocket support
    var webSocketOptions = new WebSocketOptions
    {
        KeepAliveInterval = TimeSpan.FromSeconds(120),
        ReceiveBufferSize = 4096
    };
    app.UseWebSockets(webSocketOptions);

    app.UseRouting();

    app.UseEndpoints(endpoints =>
    {
        endpoints.MapControllers();
    });
}
Create a WebSocket Handler
- Create a new service or class that will handle WebSocket connections.
public class WebSocketHandler
{
    private readonly WebSocket _webSocket;

    public WebSocketHandler(WebSocket webSocket)
    {
        _webSocket = webSocket;
    }

    public async Task HandleWebSocketAsync(CancellationToken cancellationToken)
    {
        var buffer = new byte[1024 * 4];
        WebSocketReceiveResult result;
        do
        {
            result = await _webSocket.ReceiveAsync(new ArraySegment<byte>(buffer), cancellationToken);
            if (result.MessageType == WebSocketMessageType.Text)
            {
                var message = Encoding.UTF8.GetString(buffer, 0, result.Count);
                // Process message or forward it
            }
            else if (result.MessageType == WebSocketMessageType.Close)
            {
                await _webSocket.CloseAsync(WebSocketCloseStatus.NormalClosure, "Closing", cancellationToken);
            }
        } while (!cancellationToken.IsCancellationRequested);
    }
}
Create a WebSocket Controller
- In your
Controllersfolder, create a new controller that listens for WebSocket connections.
[ApiController]
[Route("api/[controller]")]
public class WebSocketController : ControllerBase
{
    private readonly WebSocketHandler _webSocketHandler;

    public WebSocketController(WebSocketHandler webSocketHandler)
    {
        _webSocketHandler = webSocketHandler;
    }

    [HttpGet("connect")]
    public async Task<IActionResult> Connect(CancellationToken cancellationToken)
    {
        if (!HttpContext.WebSockets.IsWebSocketRequest)
        {
            return BadRequest("WebSocket request expected");
        }

        var webSocket = await HttpContext.WebSockets.AcceptWebSocketAsync();
        await _webSocketHandler.HandleWebSocketAsync(cancellationToken);

        return Ok();
    }
}
Configure Dependency Injection
- In
Startup.cs(orProgram.csin .NET 6), register theWebSocketHandleras a service.
public void ConfigureServices(IServiceCollection services)
{
    services.AddSingleton<WebSocketHandler>();
    services.AddControllers();
}
Handle WebSocket Messages
- In your
WebSocketHandler, you can add logic to process WebSocket messages. This includes reading, sending, and handling different types of messages.
For instance, in the HandleWebSocketAsync method:
if (result.MessageType == WebSocketMessageType.Text)
{
    var message = Encoding.UTF8.GetString(buffer, 0, result.Count);
    // Send a response back to the client
    var response = Encoding.UTF8.GetBytes($"You said: {message}");
    await _webSocket.SendAsync(new ArraySegment<byte>(response), WebSocketMessageType.Text, true, cancellationToken);
}
Run the Application
- Now, run your application. You can test the WebSocket API using a WebSocket client, such as Postman, a WebSocket testing tool, or a custom JavaScript client in the browser.
Testing WebSocket in JavaScript
You can test your WebSocket API using JavaScript as follows:
const socket = new WebSocket('ws://localhost:5000/api/websocket/connect');

socket.onopen = () => {
    console.log('WebSocket connection established');
    socket.send('Hello WebSocket Server!');
};

socket.onmessage = (event) => {
    console.log('Message from server:', event.data);
};

socket.onclose = () => {
    console.log('WebSocket connection closed');
};
Handle Errors & Timeouts
- Add proper error handling to your WebSocket logic. Handle scenarios such as client disconnects or timeouts.
- Ensure to handle both inbound and outbound message scenarios.
With these steps, you've created a WebSocket API in ASP.NET Core! This allows you to send and receive real-time data between a client (e.g., browser or mobile app) and your server.


Leave Comment