
Here in this article, we’ll let you know steps on how to configure Range Extender by using the WPS button. Using the WPS button on the TP-Link extender to set up the connection to the existing gateway is the easiest way. There are two ways to use the WPS button on the User device (Extender or WiFi Router):
1. Press the Button physically on the Extender,
2. Start the WPS button by login to the Management Page of Extender.
NOTE: Before you start the WPS Push-Button process, make sure the extender needs to plugin to the Wall Jack (directly).
With WPS push button on the extender helps you to change the wireless settings of the extender. So that, it will extend the WiFi with _ext or _EXT name written on the existing WiFi Network.
Steps to explain how to configure Range extender via WPS button:

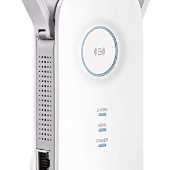
1. Plug your TP-Link Repeater RE200 into a power outlet near your main WiFi Router.
2. Start by pushing the WPS button on your main wireless Router/AP first, then push the WPS button on your TP-Link Extender.
3. Once it is connected you can see the stable power light on the extender.
4. Moreover when you look up in the list of available WiFi on your device. It will show you the extended WiFi Network Name.
5. To connect with your extended WiFi Network, you need to use the same password that you used with your existing gateway network.
6. Enter “www.tplinkrepeater.net” in your web browser, to access the TP-Link Extender Page.
7. You can also access the extender page by using the IP address assigned by the existing gateway or router to your TP-Link RE200.
8. To get the IP address for your extender, you need to login to Wireless Router first.
NOTE1: After you have pushed the WPS button of your router/AP. After that, you have 2 minutes to push the WPS button on the Range Extender. So it is our recommendation to push the WPS button of your TP-Link RE200 product as soon as you have pushed the WPS button of your wireless router.
IMPORTANT TIPS:
After pushing the WPS button of your Existing gateway or wireless router/AP.
The wireless router or Access point WPS LED should start blinking amber. If it doesn’t blink which means you need to push the WPS button again wait until the LED light on your router starts blinking. With the range extender, you can try the same steps if it is going through the above situation. Once your extender is rebooted, the LED light should start blinking.
The WPS Process will take 2-3 minutes. After that, you can check the wireless signal in your wireless compatible device. If it is not available in the list, either you can Turn off / on the WiFi on that particular device or you can restart the TP-Link Range Extender. In the end, your extender is set up and successfully connected to the existing WiFi network.
After 2 minutes, if the wireless signal LED of your TP-Link Range Extender is still off, it means the WPS process fails. In that case, you can try this the WPS process again by pushing the button. You can repeat this process until the extender is connected.
At last, you can put your Range Extender in a proper place where you want to extend the wireless network’s coverage, and enjoy the extended wireless network. No need to repeat the process. Once it’s done, it will connect automatically every time you plug it back in.
Some of the issues that you faced while setting up the TP-Link Extender:
• Sometimes you may find it is difficult to connect your RE product to your Router/AP using the WPS button.
• Sometimes you can only connect your dual-band RE product to the WiFi 2.4G or 5G of your dual-band router/AP using the WPS button, but not both bands’ WiFi.
Sometimes difficult to connect your Range Extender by using WPS Button:
1. It happens when your extender is too far from the existing WiFi Network and unable to get in the range of WiFi Network. Change the location of your TP-Link, put it a bit closer to the Main Router.
2. As WPS button is disabled. You need to enable the WPS button by login to TP-Link Range Extender by typing “tplinkrepeater.net”.
3. Change the Power jack. Make sure it should be plugged to the wall jack, not in the power extension.
If it is not working, you can reset the TP-Link Extender.
Sometimes your TP-Link Extender cannot connect with dual-band WiFi Network:
1. To avoid these kinds of issues, you can manually connect to the main WiFi Network by login to your TP-Link. Use the web address “www.tplinkrepeater.net” and go for setup wizard. After that, it will scan for the available network of 2.4GHz and 5GHz.
2. WiFi Security Key: Make sure to use the correct password to connect you're both the WiFi Network.

Leave a Comment