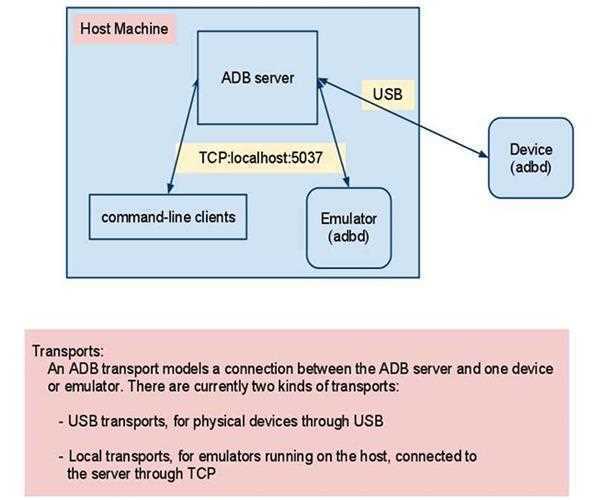
Android Debug Bridge (adb) is a versatile command line tool that lets you communicate with an emulator instance or connected Android-powered device. It is a client-server program that includes three components:
A client, which runs on your development machine. You can invoke a client from a shell by issuing an adb command. Other Android tools such as the ADT plugin and DDMS also create adb clients.A server, which runs as a background process on your development machine. The server manages communication between the client and the adb daemon running on an emulator or device.
A daemon, which runs as a background process on each emulator or device instance.
Enabling adb Debugging on your phone
In order to use adb with a device connected over USB, you must enable USB
debugging in the device system settings, under Developer options.
1. On Android 4.2 and higher, the Developer options screen is hidden by default. To make it visible, go to Settings > About phone and tap Build number seven times. Return to the previous screen to find Developer options at the bottom.
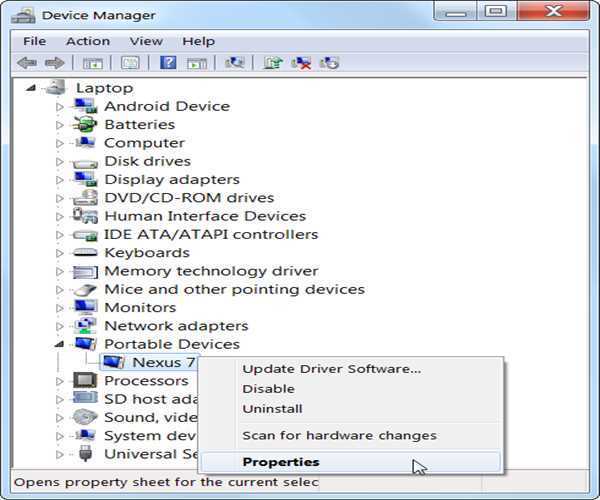
2. Now open device manager in computer and select portable devices and write click in your device name, now select Properties
3. Browse my computer for driver software and set the path C:\Eclipse\adt-bundle-windows-x86_64-20131030\adt-bundle-windows-x86_64-20131030\sdk\extras\google\usb_driver
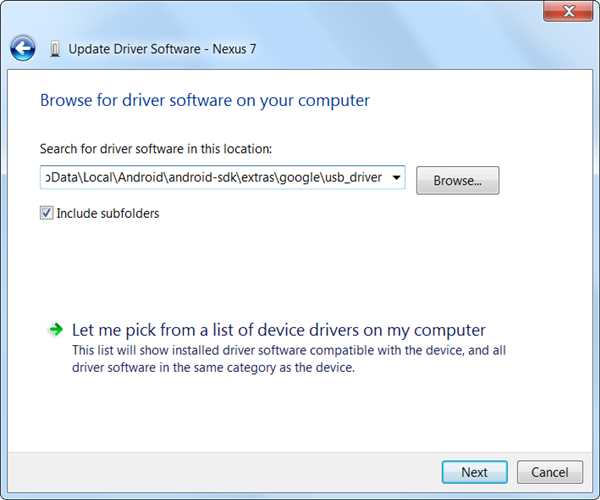
And click Next then finish.
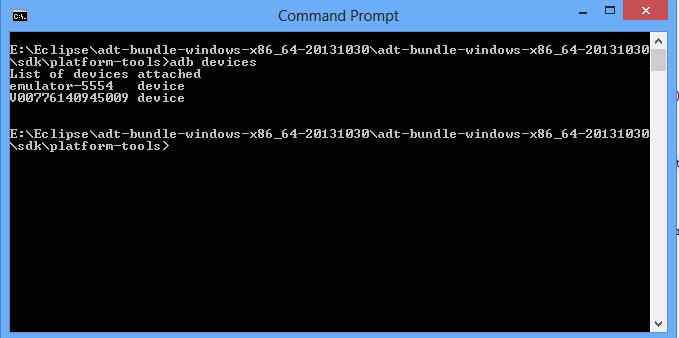
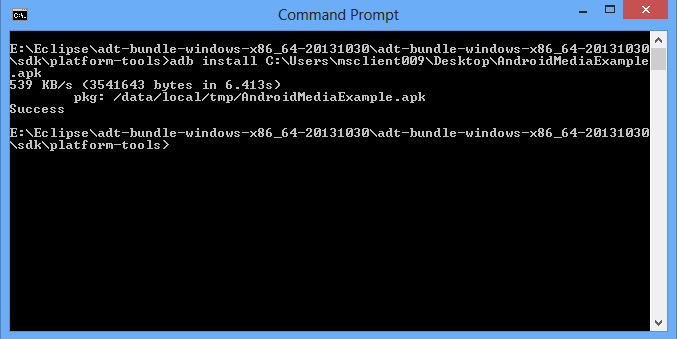
Find adb in your system using command prompt
C:\Eclipse\adt-bundle-windows-x86_64-20131030\adt-bundle-windows-x86_64-20131030\sdk\platform-tools>
Type-: adb devices

Leave Comment